Hail Storm Roof Damage Documentation in Eden Prairie
Document hail damage immediately after storms by photographing damage from multiple angles, creating timestamped logs with weather data, and measuring impact marks. Take close-ups of lifted shingles, granule loss, and exposed underlayment, plus wide shots showing overall roof condition. Include a coin or ruler for scale reference. Record the storm date, your contact information, and create a systematic photo inventory that insurance adjusters can easily review for your claim approval.
Step 1: Safety Assessment Before Documentation
Never climb onto a damaged roof to document hail impact. Instead, use a ladder to safely photograph damage from the roof edge, or document from ground level with a telephoto lens or binoculars. In Eden Prairie, spring and summer storms can leave roofs slippery with debris, making surface inspection dangerous. Wait at least 24 hours after storms pass before attempting any roof access, and only approach if you can maintain three points of contact on a stable ladder.
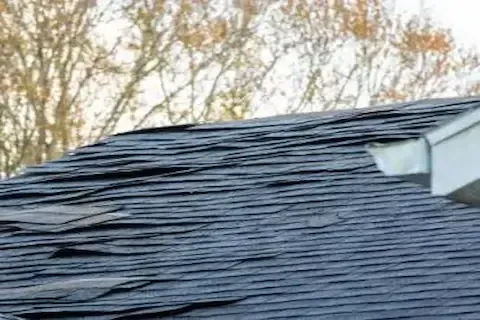
Step 2: Photograph Damage From Multiple Angles
Start documentation with wide-angle shots showing your entire roof system, then move to close-up detail photos of specific damage areas. Capture lifted or creased shingles, missing granules, cracked tiles, and any exposed underlayment. Take photos from different directions to show the same damage area under varying light conditions. Eden Prairie homeowners should include shots of gutters, downspouts, and any ground debris that fell during the storm, as these support the severity of your insurance claim.
Step 3: Create Scale References in Photos
Place a coin, ruler, or other common object next to hail damage to provide size context for insurance adjusters. This step proves critical for claims processing, as adjusters need to verify impact diameter and depth. Photograph the same damaged area both with and without the scale reference. Minnesota insurance companies often require this documentation to differentiate between hail damage and normal wear patterns on asphalt shingles.
Step 4: Document Weather Conditions and Timing
Record the exact date and time of the storm that caused damage, along with official weather service reports for your Eden Prairie location. Screenshot radar images, hail size reports, and wind speed data from the National Weather Service. This information establishes the cause and timeline of damage for your insurance claim. Include your property address and GPS coordinates in your documentation file to prove the storm affected your specific location.
Step 5: Catalog Interior Water Damage
Check your attic, ceilings, and walls for water infiltration after hail compromises your roof system. Photograph any water stains, wet insulation, or damaged personal property inside your home. Document the progression of water damage over several days, as some leaks develop slowly after storms. Eden Prairie's wet spring weather can exacerbate roof penetration damage, making interior documentation essential for comprehensive insurance claims.
Step 6: Organize Photos with Detailed Inventory
Create a numbered photo log that corresponds to each image in your documentation file. Include location descriptions, damage types, and estimated impact sizes for every photo. Use a spreadsheet or simple text document to track: photo number, roof section, damage description, and severity level. Professional Storm Damage Roof Repair contractors recommend this systematic approach because it helps insurance adjusters process claims faster and more accurately.
Step 7: Gather Supporting Documentation
Collect your homeowner's insurance policy details, previous roof inspection reports, and maintenance records to support your hail damage claim. Include receipts from recent roof work, warranty information, and any prior storm damage claims on your property. If you learned how to spot hail damage early, document that initial discovery date as well. This comprehensive file demonstrates your roof's pre-storm condition and validates the timeline of damage occurrence.
Step 8: Submit Documentation to Insurance Company
Contact your insurance company within 48 hours of storm damage to initiate your claim process. Upload your organized photo inventory and supporting documents through their online portal or email system. Include a brief written summary of the storm event, damage discovered, and any immediate repairs needed to prevent further property damage. Eden Prairie homeowners should request confirmation that all documentation was received and ask for the assigned adjuster's contact information and estimated inspection timeline.
