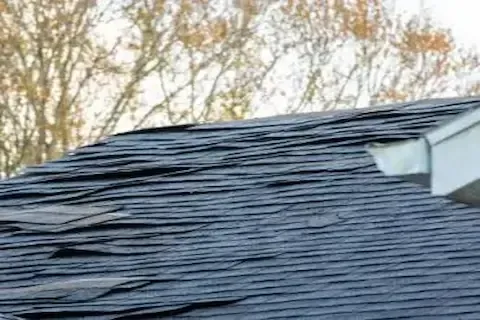
Hail Damage Roof Inspection Checklist Eden Prairie
After a hailstorm hits Eden Prairie, start your roof inspection from the ground using binoculars, then move safely onto the roof if conditions allow. Work through each zone systematically: shingles, ridge cap, flashing, gutters, skylights, and vents. Document every impact mark with photos and a written log before calling your insurance adjuster. This checklist gives you a clear, repeatable process so nothing gets missed and your claim has solid evidence behind it.
Step 1: Gather Your Tools Before You Climb
Before you touch a ladder, collect everything you need. Bring a smartphone or camera for photos, a notepad, a chalk marker to circle impact zones, a tape measure, and non-slip footwear. Eden Prairie storms often leave wet or debris-covered surfaces, so check that the roof pitch is walkable and the shingles have dried. If the slope is steep or you are uncomfortable at height, stay on the ground and use binoculars. Safety comes first—a ground-level inspection still captures a large portion of visible damage.
Step 2: Inspect Gutters and Downspouts First
Gutters are the easiest place to confirm hail size and frequency. Look for dents along the top edge of aluminum gutters and check the downspout elbows for dings. Granules washed into the gutter trough are a strong sign that shingle coating has been knocked loose. Scoop a handful and compare volume to what you would expect from normal aging. Heavy granule loss in Eden Prairie after a single storm points directly to impact damage across the entire slope above.
Step 3: Check Soft Metals on the Roof
Soft metal surfaces tell the clearest story about hail. Walk the perimeter and examine any exposed aluminum or lead flashing around chimneys, skylights, and pipe boots. A round, consistent dent pattern confirms hail contact. Count the dents per square foot and write it down—adjusters use that density figure when they measure shingle coverage. The same test applies to metal ridge caps and any decorative trim along the fascia. If soft metals show 8 to 10 hits per 10-square-foot section, expect similar impact rates on adjacent shingles.
Step 4: Walk Each Slope and Inspect Shingles
Move across the roof in parallel rows so you cover every square foot. You are looking for three specific signs on asphalt shingles: dark bruising where the mat beneath has been fractured, missing granules that expose the raw fiberglass mat, and small circular craters that feel soft when pressed. Circle each one with chalk. Photograph before and after marking so your adjuster sees both the raw damage and the flagged location. On a standard Eden Prairie home, plan at least 20 to 30 minutes per slope.
Step 5: Examine the Ridge Cap and Hip Lines
Ridge caps take direct hits because they sit at the highest point of the roof. Check for granule loss along the center ridge line and look for any cracking or lifted edges. Hip lines that run diagonally are equally exposed. A cap shingle that has been struck hard often develops a hairline crack that is not visible until water works under it the following winter. Press gently along the ridge—any flex or sponginess indicates the mat beneath has been compromised and needs replacement.
Step 6: Inspect Skylights, Vents, and Pipe Boots
Plastic skylights crack under large hail and the damage is obvious. Acrylic domes may show spider cracks or pitting. Metal-framed skylights hold up better but the frame itself dents. Check every roof vent for dented louvers and examine rubber pipe boots for tears at the collar. A cracked boot seal is a slow leak waiting to develop once freeze-thaw cycles begin in a Minnesota fall. Note the brand and size of each boot so your contractor can bring exact replacements.
Step 7: Document Everything Before You Leave the Roof
Before you climb down, do a final pass with your camera. Photograph each flagged area from two distances: close enough to show the individual impact and wide enough to show the location on the slope. Take one full photo of each slope from the ground showing overall coverage. Date-stamp your photos if your camera allows it. Compile your written notes—number of hits per section, materials affected, and any lifted or displaced shingles. This documentation package is what separates a smooth insurance claim from a disputed one. For a real-world example of how this documentation process played out locally, review the July storm repair walkthrough.
Step 8: Hand Your Checklist to a Licensed Contractor
Your completed checklist is useful to your adjuster, but a licensed Minnesota roofing contractor will add a professional inspection report that carries more weight with the insurance company. A qualified contractor can measure exact square footage of affected sections, identify secondary damage you may have missed, and provide a line-item estimate that matches industry pricing databases. Eden Prairie homeowners who go into the adjuster meeting with both their own documentation and a contractor report consistently see faster approvals. If you need professional help from that point forward, Storm Damage Roof Repair is available to assess the damage and guide you through the claims process.
